> ## Documentation Index
> Fetch the complete documentation index at: https://docs.oleria.ai/llms.txt
> Use this file to discover all available pages before exploring further.
# Google Cloud Platform
Oleria provides identity security and access management teams with visibility and intelligence into who has access to what, where they got that access, how they use it, and whether they should even have it. As part of that promise, we deeply integrate your Google Cloud Platform environment into the Oleria platform. This document provides step-by-step guidance for integrating GCP - at either the organization level or project level - with your Oleria workspace.
## Prerequisites
* **GCP Organization Admin** or **Project Owner** role to grant IAM roles to the connector service account
* **Google Workspace Super Admin** role to configure domain-wide delegation
Use a service account (and not an employee account) with the suggested privileges for the integration to ensure continuity.
## Integration Approaches
Oleria supports two integration scopes. Follow the one most appropriate for your organization.
* **[Organization (Recommended)](#integrate-gcp-organization)** - Oleria sees all projects, folders, and resources across your entire GCP org, including org-level IAM policies and cross-project bindings. Recommended for full visibility.
* **[Project](#integrate-gcp-project)** - Oleria is scoped to IAM bindings, resources, and storage within a single project only. Use this if you don't have org-level access or only want to connect a specific project.
***
## Integrate GCP Organization
1. Log in to the [Google Cloud Console](https://console.cloud.google.com) and navigate to **IAM & Admin** → **Service Accounts**.
 2. Select **Create Service Account**. Provide a name such as `oleria-connector` and select **Create and Continue**.
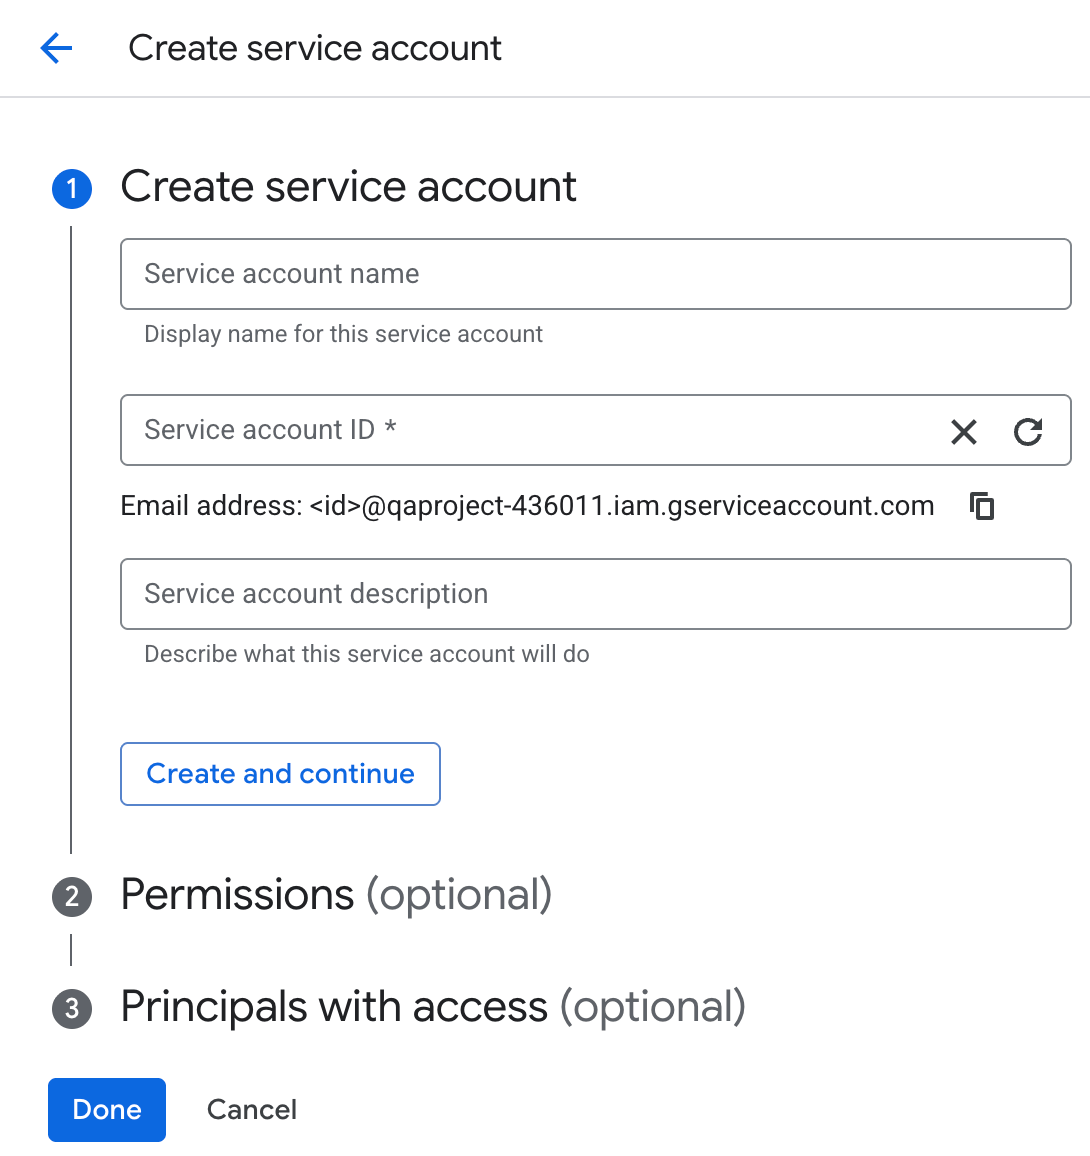 3. Skip the optional role grant and user access steps. Select **Done**.
The connector calls a number of Google Cloud APIs. Each one must be enabled in the **host project** of the connector service account; if any are disabled, authentication or sync will fail.
**Option A: Using the Google Cloud Console**
1. In the Google Cloud Console, select the project that owns the connector service account from the resource picker.
2. Navigate to **APIs & Services** → **Enabled APIs & services** → **Enable APIs and Services**.
3. Search for and enable each of the following:
* Cloud Resource Manager API
* Identity and Access Management (IAM) API
* Cloud Asset API
* Cloud Identity API
* Admin SDK API
* Cloud Storage API
* Cloud Logging API
* Secret Manager API
**Option B: Using the gcloud CLI**
```bash theme={null}
gcloud services enable \
cloudresourcemanager.googleapis.com \
iam.googleapis.com \
cloudasset.googleapis.com \
cloudidentity.googleapis.com \
admin.googleapis.com \
storage.googleapis.com \
logging.googleapis.com \
secretmanager.googleapis.com \
--project=YOUR_PROJECT_ID
```
`YOUR_PROJECT_ID` is the project that owns the connector service account. For Cloud Resource Manager, IAM, Cloud Asset, Cloud Identity, Admin SDK, Cloud Storage, and Cloud Logging, enabling the API on this single host project is sufficient - the connector calls these APIs on behalf of resources across the whole organization. Secret Manager is the exception; see below.
**Secret Manager is enabled per-project, not org-wide.** Google checks the project that owns each secret, not the connector's host project - so this API needs a separate step, and only on projects that have billing enabled (Secret Manager is a billable API).
**Who runs this:** you, using your own Google account - not the connector service account. This is a one-time setup task and grants nothing to the connector itself (that happens in the next Step).
**Roles you need for this step:**
| Role | For | Granted where |
| -------------------------------------- | --------------------------- | ----------------------- |
| `roles/cloudasset.viewer` | listing projects in the org | organization level |
| `roles/serviceusage.serviceUsageAdmin` | enabling the API | organization level |
| `roles/billing.viewer` | listing billed projects | on each billing account |
Grant yourself the first two if you don't already have them - Organization Admin from Prerequisites does not include any of these three roles:
```bash theme={null}
gcloud organizations add-iam-policy-binding YOUR_ORG_ID \
--member="user:YOUR_EMAIL" --role="roles/cloudasset.viewer"
gcloud organizations add-iam-policy-binding YOUR_ORG_ID \
--member="user:YOUR_EMAIL" --role="roles/serviceusage.serviceUsageAdmin"
```
The billing role must be granted by whoever already administers the billing account (find `YOUR_BILLING_ACCOUNT_ID` under **Billing** → **Account Management**):
```bash theme={null}
gcloud billing accounts add-iam-policy-binding YOUR_BILLING_ACCOUNT_ID \
--member="user:YOUR_EMAIL" --role="roles/billing.viewer"
```
**Why the script below builds two lists instead of one:** a billing account isn't owned by an organization - the same billing account can pay for projects in other orgs too. So "every project my billing account pays for" and "every project in my org" are two different questions with two different answers. The script asks both and keeps only the overlap, so it never touches a project outside your org.
```bash theme={null}
ORG_PROJECTS=$(gcloud asset search-all-resources \
--scope="organizations/YOUR_ORG_ID" \
--asset-types="cloudresourcemanager.googleapis.com/Project" \
--format="value(name)" \
| sed 's#.*/##' | sort -u)
BILLED_PROJECTS=$(for acct in $(gcloud billing accounts list --format="value(name)"); do
gcloud billing projects list --billing-account="$acct" \
--filter="billingEnabled=true" \
--format="value(projectId)"
done | sort -u)
if [ -z "$ORG_PROJECTS" ] || [ -z "$BILLED_PROJECTS" ]; then
echo "No projects resolved - check that both commands above succeeded." >&2
fi
TARGETS=$(comm -12 <(echo "$ORG_PROJECTS") <(echo "$BILLED_PROJECTS"))
echo "$TARGETS" | wc -l
echo "$TARGETS"
```
**Review the `$TARGETS` list above before continuing** - enabling a service is a state change with no bulk undo. Once it looks right:
```bash theme={null}
echo "$TARGETS" | while read -r p; do
[ -n "$p" ] || continue
if err=$(gcloud services enable secretmanager.googleapis.com --project="$p" 2>&1); then
echo "$p: ENABLED"
else
echo "$p: FAILED - $(echo "$err" | head -1)"
fi
done
```
A project left off this list simply isn't checked for secrets - nothing else about its integration is affected. You can run this against a subset of `$TARGETS` if you only want secret visibility in some projects.
| Placeholder | Replace with |
| ------------------------- | ---------------------------------------------------- |
| `YOUR_ORG_ID` | numeric org ID, under **IAM & Admin** → **Settings** |
| `YOUR_EMAIL` | your own Google account, not the connector's |
| `YOUR_BILLING_ACCOUNT_ID` | under **Billing** → **Account Management** |
1. In the Google Cloud Console, click the project selector at the top of the page and select your **Organization** from the resource picker.
3. Skip the optional role grant and user access steps. Select **Done**.
The connector calls a number of Google Cloud APIs. Each one must be enabled in the **host project** of the connector service account; if any are disabled, authentication or sync will fail.
**Option A: Using the Google Cloud Console**
1. In the Google Cloud Console, select the project that owns the connector service account from the resource picker.
2. Navigate to **APIs & Services** → **Enabled APIs & services** → **Enable APIs and Services**.
3. Search for and enable each of the following:
* Cloud Resource Manager API
* Identity and Access Management (IAM) API
* Cloud Asset API
* Cloud Identity API
* Admin SDK API
* Cloud Storage API
* Cloud Logging API
* Secret Manager API
**Option B: Using the gcloud CLI**
```bash theme={null}
gcloud services enable \
cloudresourcemanager.googleapis.com \
iam.googleapis.com \
cloudasset.googleapis.com \
cloudidentity.googleapis.com \
admin.googleapis.com \
storage.googleapis.com \
logging.googleapis.com \
secretmanager.googleapis.com \
--project=YOUR_PROJECT_ID
```
`YOUR_PROJECT_ID` is the project that owns the connector service account. For Cloud Resource Manager, IAM, Cloud Asset, Cloud Identity, Admin SDK, Cloud Storage, and Cloud Logging, enabling the API on this single host project is sufficient - the connector calls these APIs on behalf of resources across the whole organization. Secret Manager is the exception; see below.
**Secret Manager is enabled per-project, not org-wide.** Google checks the project that owns each secret, not the connector's host project - so this API needs a separate step, and only on projects that have billing enabled (Secret Manager is a billable API).
**Who runs this:** you, using your own Google account - not the connector service account. This is a one-time setup task and grants nothing to the connector itself (that happens in the next Step).
**Roles you need for this step:**
| Role | For | Granted where |
| -------------------------------------- | --------------------------- | ----------------------- |
| `roles/cloudasset.viewer` | listing projects in the org | organization level |
| `roles/serviceusage.serviceUsageAdmin` | enabling the API | organization level |
| `roles/billing.viewer` | listing billed projects | on each billing account |
Grant yourself the first two if you don't already have them - Organization Admin from Prerequisites does not include any of these three roles:
```bash theme={null}
gcloud organizations add-iam-policy-binding YOUR_ORG_ID \
--member="user:YOUR_EMAIL" --role="roles/cloudasset.viewer"
gcloud organizations add-iam-policy-binding YOUR_ORG_ID \
--member="user:YOUR_EMAIL" --role="roles/serviceusage.serviceUsageAdmin"
```
The billing role must be granted by whoever already administers the billing account (find `YOUR_BILLING_ACCOUNT_ID` under **Billing** → **Account Management**):
```bash theme={null}
gcloud billing accounts add-iam-policy-binding YOUR_BILLING_ACCOUNT_ID \
--member="user:YOUR_EMAIL" --role="roles/billing.viewer"
```
**Why the script below builds two lists instead of one:** a billing account isn't owned by an organization - the same billing account can pay for projects in other orgs too. So "every project my billing account pays for" and "every project in my org" are two different questions with two different answers. The script asks both and keeps only the overlap, so it never touches a project outside your org.
```bash theme={null}
ORG_PROJECTS=$(gcloud asset search-all-resources \
--scope="organizations/YOUR_ORG_ID" \
--asset-types="cloudresourcemanager.googleapis.com/Project" \
--format="value(name)" \
| sed 's#.*/##' | sort -u)
BILLED_PROJECTS=$(for acct in $(gcloud billing accounts list --format="value(name)"); do
gcloud billing projects list --billing-account="$acct" \
--filter="billingEnabled=true" \
--format="value(projectId)"
done | sort -u)
if [ -z "$ORG_PROJECTS" ] || [ -z "$BILLED_PROJECTS" ]; then
echo "No projects resolved - check that both commands above succeeded." >&2
fi
TARGETS=$(comm -12 <(echo "$ORG_PROJECTS") <(echo "$BILLED_PROJECTS"))
echo "$TARGETS" | wc -l
echo "$TARGETS"
```
**Review the `$TARGETS` list above before continuing** - enabling a service is a state change with no bulk undo. Once it looks right:
```bash theme={null}
echo "$TARGETS" | while read -r p; do
[ -n "$p" ] || continue
if err=$(gcloud services enable secretmanager.googleapis.com --project="$p" 2>&1); then
echo "$p: ENABLED"
else
echo "$p: FAILED - $(echo "$err" | head -1)"
fi
done
```
A project left off this list simply isn't checked for secrets - nothing else about its integration is affected. You can run this against a subset of `$TARGETS` if you only want secret visibility in some projects.
| Placeholder | Replace with |
| ------------------------- | ---------------------------------------------------- |
| `YOUR_ORG_ID` | numeric org ID, under **IAM & Admin** → **Settings** |
| `YOUR_EMAIL` | your own Google account, not the connector's |
| `YOUR_BILLING_ACCOUNT_ID` | under **Billing** → **Account Management** |
1. In the Google Cloud Console, click the project selector at the top of the page and select your **Organization** from the resource picker.
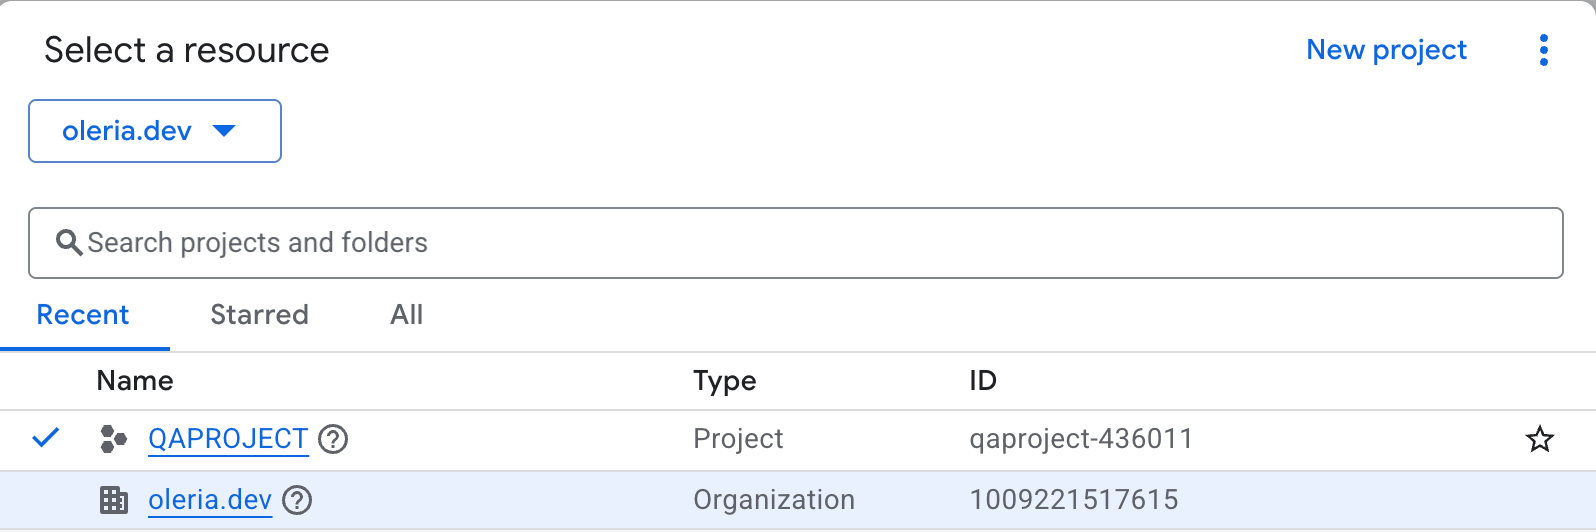 2. Navigate to **IAM & Admin** → **IAM** and select **Grant Access**.
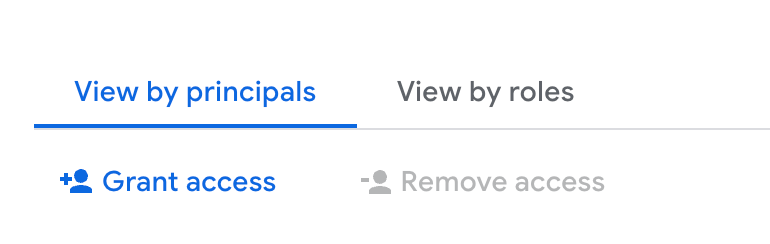 3. Enter the connector service account email and assign the following roles:
```
roles/iam.securityReviewer
roles/cloudasset.viewer
roles/resourcemanager.organizationViewer
roles/resourcemanager.folderViewer
roles/storage.objectViewer
roles/logging.viewer
roles/secretmanager.viewer
```
`roles/cloudasset.viewer` lets the connector use Cloud Asset Inventory to scan IAM policy bindings and service account inventory across the organization in bulk, rather than resource by resource. Sync fails without it. `roles/logging.viewer` is required for activity sync via Cloud Audit Logs. `roles/secretmanager.viewer` grants 11 permissions in total; of those, Oleria's connector relies on three - `secretmanager.secrets.list`, `secretmanager.secrets.getIamPolicy`, and `secretmanager.versions.get`. Oleria never reads secret values, so `roles/secretmanager.secretAccessor` (which grants `secretmanager.versions.access`) is intentionally NOT required.
Oleria's GCP risk signals come entirely from Security Command Center (SCC) findings.
Skipping this step doesn't break setup - the connection still completes and syncs your IAM data normally - but no GCP risks will appear in Risk Monitoring until all three of the following are done.
1. Enable the **Security Command Center API** (`securitycenter.googleapis.com`) in the host project.
2. Grant the connector service account `roles/securitycenter.findingsViewer` at the organization level.
3. Confirm SCC itself is activated for your organization. This is separate from enabling the API: go to [Security Command Center](https://console.cloud.google.com/security/command-center/overview) in the Cloud Console and select your organization. If a findings dashboard loads, SCC is active. If you see an activation prompt instead, an **Organization Administrator** or **Security Center Admin** needs to activate a tier (Standard is free) before Oleria can surface findings.
1. In **IAM & Admin** → **Service Accounts**, select the service account you created in the first step.
2. Navigate to the **Keys** tab and select **Add Key** → **Create new key**.
3. Enter the connector service account email and assign the following roles:
```
roles/iam.securityReviewer
roles/cloudasset.viewer
roles/resourcemanager.organizationViewer
roles/resourcemanager.folderViewer
roles/storage.objectViewer
roles/logging.viewer
roles/secretmanager.viewer
```
`roles/cloudasset.viewer` lets the connector use Cloud Asset Inventory to scan IAM policy bindings and service account inventory across the organization in bulk, rather than resource by resource. Sync fails without it. `roles/logging.viewer` is required for activity sync via Cloud Audit Logs. `roles/secretmanager.viewer` grants 11 permissions in total; of those, Oleria's connector relies on three - `secretmanager.secrets.list`, `secretmanager.secrets.getIamPolicy`, and `secretmanager.versions.get`. Oleria never reads secret values, so `roles/secretmanager.secretAccessor` (which grants `secretmanager.versions.access`) is intentionally NOT required.
Oleria's GCP risk signals come entirely from Security Command Center (SCC) findings.
Skipping this step doesn't break setup - the connection still completes and syncs your IAM data normally - but no GCP risks will appear in Risk Monitoring until all three of the following are done.
1. Enable the **Security Command Center API** (`securitycenter.googleapis.com`) in the host project.
2. Grant the connector service account `roles/securitycenter.findingsViewer` at the organization level.
3. Confirm SCC itself is activated for your organization. This is separate from enabling the API: go to [Security Command Center](https://console.cloud.google.com/security/command-center/overview) in the Cloud Console and select your organization. If a findings dashboard loads, SCC is active. If you see an activation prompt instead, an **Organization Administrator** or **Security Center Admin** needs to activate a tier (Standard is free) before Oleria can surface findings.
1. In **IAM & Admin** → **Service Accounts**, select the service account you created in the first step.
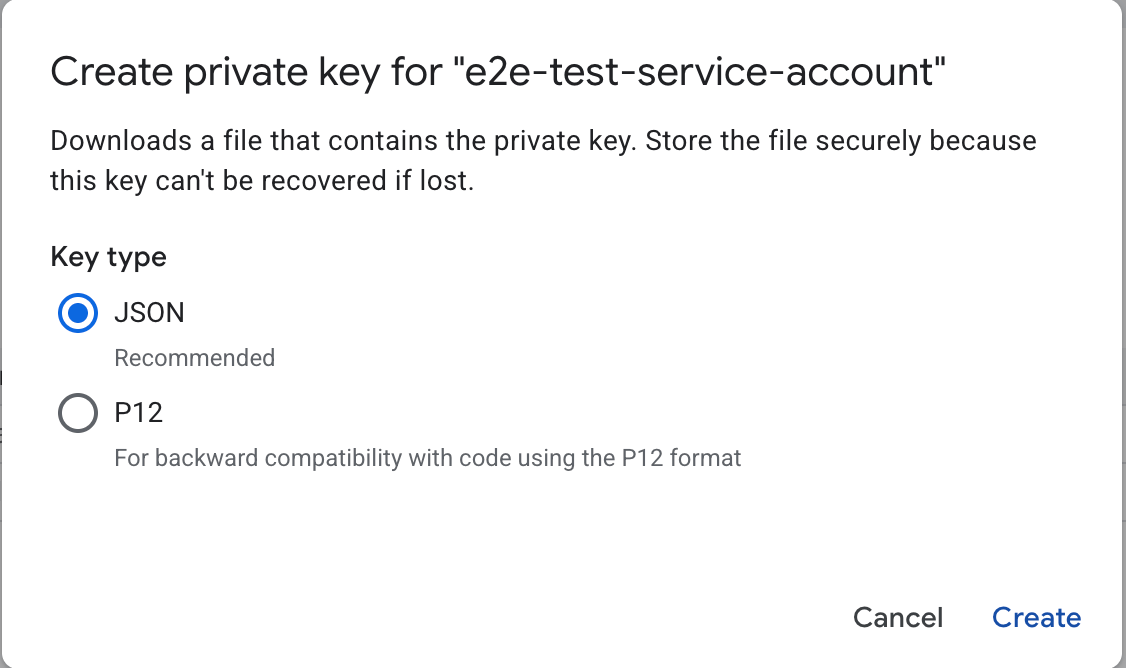
2. Navigate to the **Keys** tab and select **Add Key** → **Create new key**.
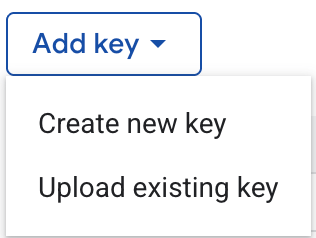 3. Select **JSON** format and select **Create**. The key file will be downloaded to your machine. Keep this file secure - you will provide it to Oleria in the final step.
 Domain-wide delegation allows the connector service account to enumerate Google Workspace users and groups on behalf of a delegated admin.
1. Log in to the [Google Workspace Admin Console](https://admin.google.com) and navigate to **Security** → **Access and data control** → **API controls**. Under **Domain-wide delegation**, select **Manage Domain Wide Delegation**.
Domain-wide delegation allows the connector service account to enumerate Google Workspace users and groups on behalf of a delegated admin.
1. Log in to the [Google Workspace Admin Console](https://admin.google.com) and navigate to **Security** → **Access and data control** → **API controls**. Under **Domain-wide delegation**, select **Manage Domain Wide Delegation**.
 2. Select **Add new**.
3. Provide the **Client ID** of the service account (found under **IAM & Admin** → **Service Accounts** → select the SA → **Details** tab → **Unique ID**) and add the following OAuth scopes:
```
https://www.googleapis.com/auth/admin.directory.user.readonly
https://www.googleapis.com/auth/cloud-identity.groups.readonly
```
2. Select **Add new**.
3. Provide the **Client ID** of the service account (found under **IAM & Admin** → **Service Accounts** → select the SA → **Details** tab → **Unique ID**) and add the following OAuth scopes:
```
https://www.googleapis.com/auth/admin.directory.user.readonly
https://www.googleapis.com/auth/cloud-identity.groups.readonly
```
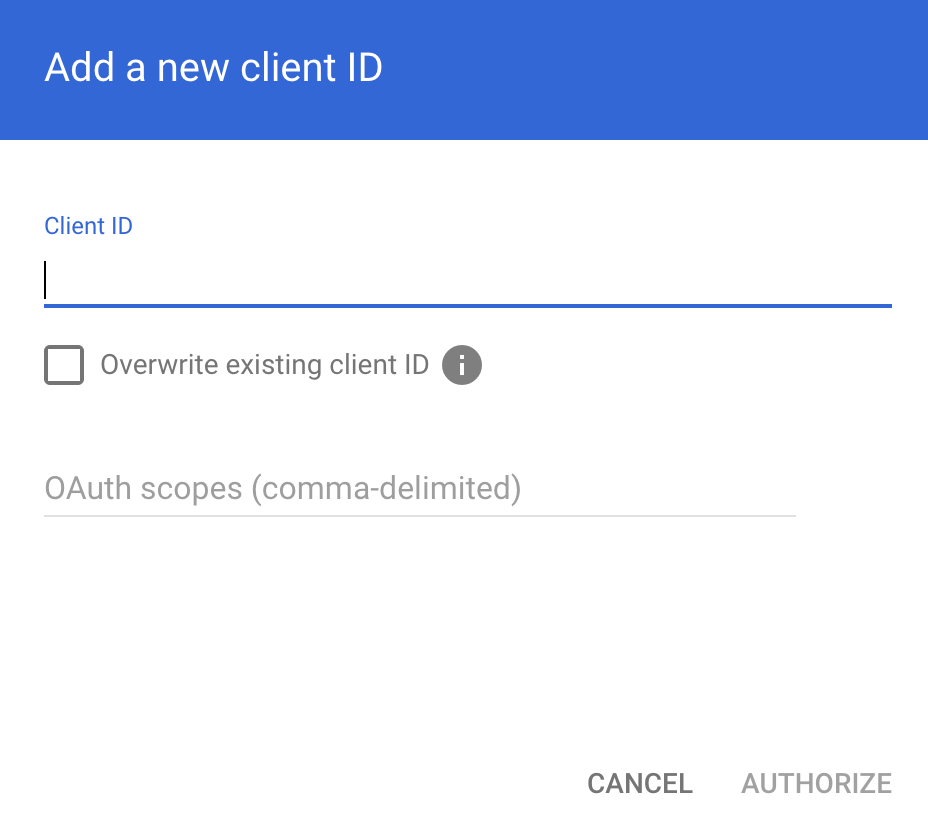 4. Select **Authorize**.
The Google Workspace admin email provided as the Workspace Delegate Email in the final step must have at least read access to user and group directories.
This step enables Oleria to ingest Cloud Audit Logs for user activity insights.
Choose a globally unique name for your audit log bucket - you'll use it as `YOUR_AUDIT_BUCKET` throughout this step.
**Option A: Using the Google Cloud Console**
1. In the Cloud Console, confirm your **Organization** is selected in the resource picker at the top of the page.
2. Navigate to **Cloud Storage** → **Buckets** and select **Create**. Provide a globally unique bucket name (this will be your `YOUR_AUDIT_BUCKET`), choose a location, and accept the defaults for the remaining settings. Select **Create**.
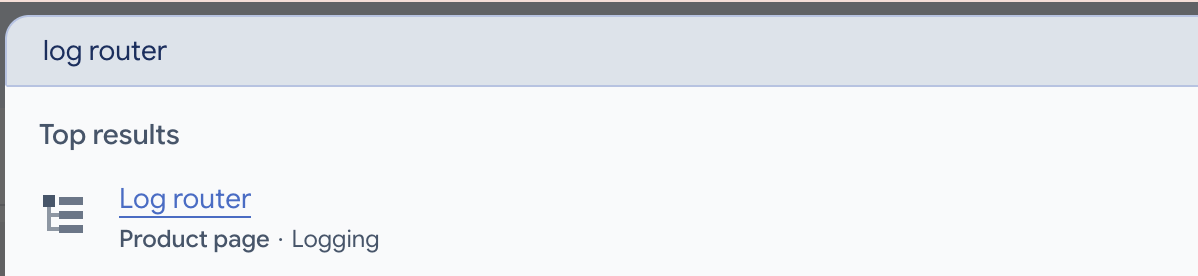
3. Navigate to **Logging** → **Log Router**. The fastest way is to type `log router` in the GCP search bar at the top of the page and select **Log Router** (listed as **Product page - Logging**) from the results.
4. Select **Authorize**.
The Google Workspace admin email provided as the Workspace Delegate Email in the final step must have at least read access to user and group directories.
This step enables Oleria to ingest Cloud Audit Logs for user activity insights.
Choose a globally unique name for your audit log bucket - you'll use it as `YOUR_AUDIT_BUCKET` throughout this step.
**Option A: Using the Google Cloud Console**
1. In the Cloud Console, confirm your **Organization** is selected in the resource picker at the top of the page.
2. Navigate to **Cloud Storage** → **Buckets** and select **Create**. Provide a globally unique bucket name (this will be your `YOUR_AUDIT_BUCKET`), choose a location, and accept the defaults for the remaining settings. Select **Create**.
3. Navigate to **Logging** → **Log Router**. The fastest way is to type `log router` in the GCP search bar at the top of the page and select **Log Router** (listed as **Product page - Logging**) from the results.
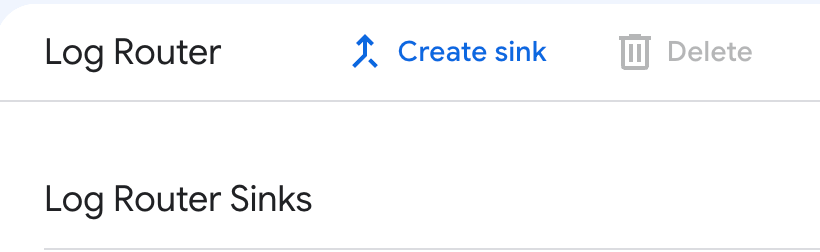
 4. On the **Log Router Sinks** page, confirm the resource scope shows your **Organization**, then select **Create Sink** at the top of the page.
 5. The **Create logs routing sink** wizard opens with four steps. Complete them as follows:
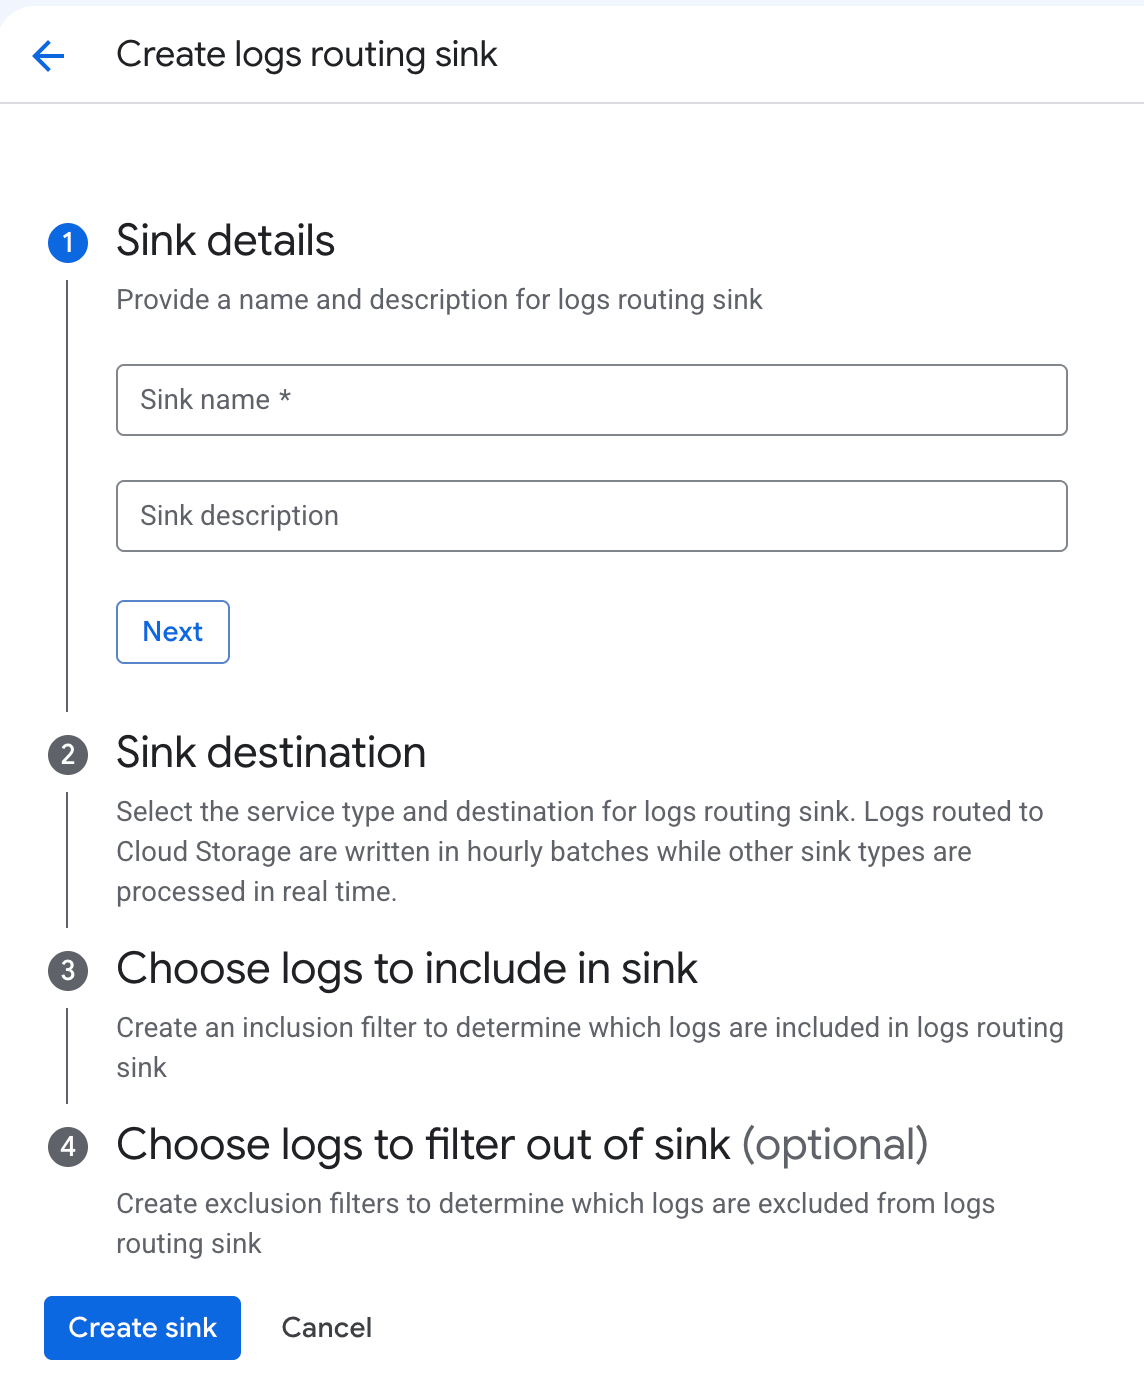 **Sink details:** Enter `audit-log-sink` as the **Sink name**. Optionally add a description. Select **Next**.
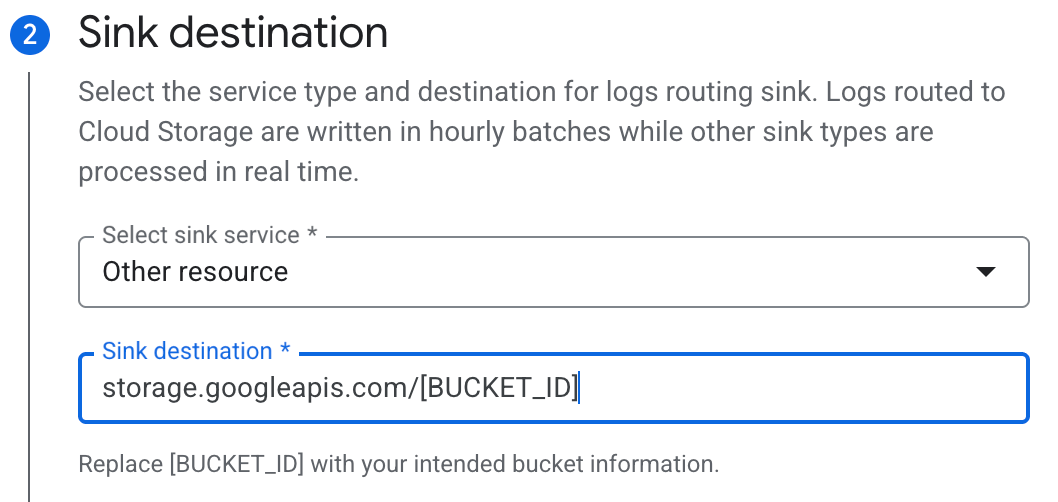
**Sink destination:** From the **Select sink service** dropdown, choose **Cloud Storage bucket** and select your bucket. GCP will automatically switch the service type to **Other resource** and populate the **Sink destination** field with `storage.googleapis.com/YOUR_AUDIT_BUCKET` - this is expected behavior at the organization level. Select **Next**.
**Sink details:** Enter `audit-log-sink` as the **Sink name**. Optionally add a description. Select **Next**.
**Sink destination:** From the **Select sink service** dropdown, choose **Cloud Storage bucket** and select your bucket. GCP will automatically switch the service type to **Other resource** and populate the **Sink destination** field with `storage.googleapis.com/YOUR_AUDIT_BUCKET` - this is expected behavior at the organization level. Select **Next**.
 **Choose logs to include in sink:** Select **Include logs ingested by this organization and all child resources**. This ensures audit logs from all projects and folders across your organization are captured. Then, in the **Build inclusion filter** field, enter the following and select **Next**:
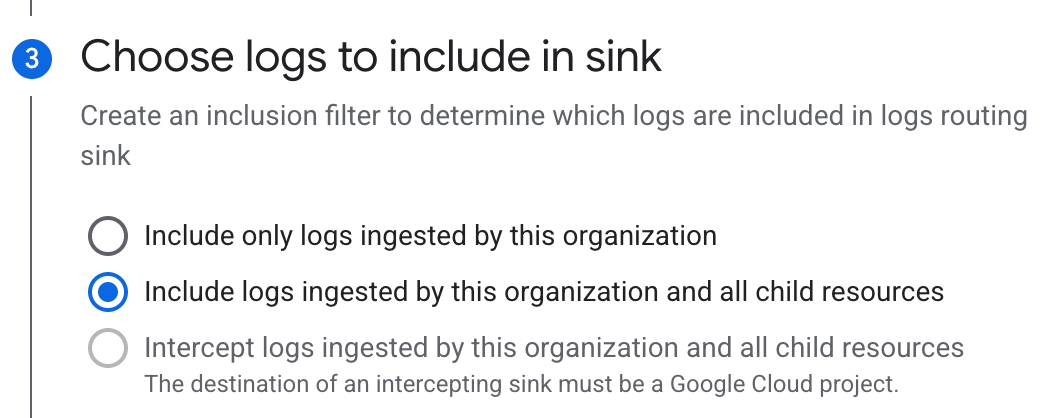 ```
logName=~"cloudaudit.googleapis.com"
```
```
logName=~"cloudaudit.googleapis.com"
```
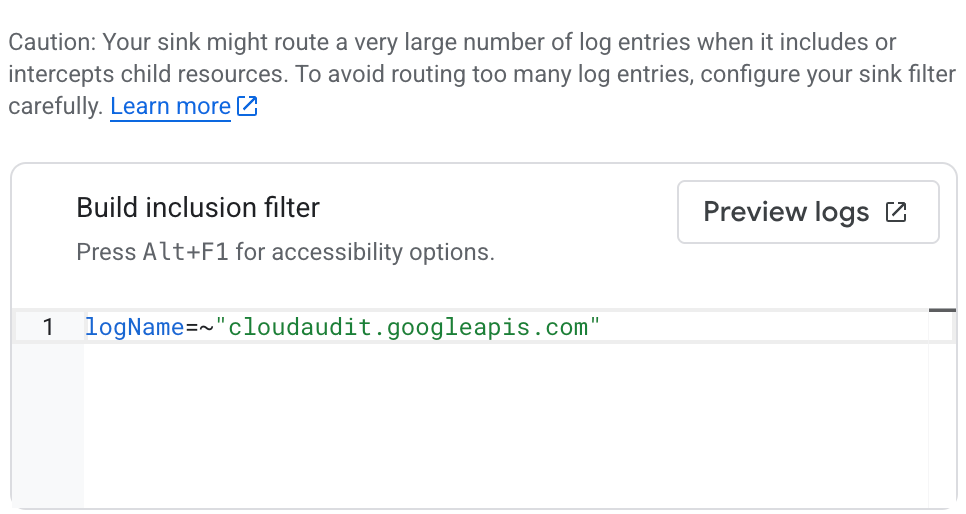 GCP may show a caution that a large number of log entries could be routed. This is expected - the inclusion filter above limits export to audit logs only.
**Choose logs to filter out of sink (optional):** No exclusion filters are needed. Select **Create Sink**.
6. After the sink is created, open it from the **Log Router Sinks** list and copy the **Writer Identity** service account email (e.g. `serviceAccount:p123456789-xxxxxx@gcp-sa-logging.iam.gserviceaccount.com`). You will use this address in the next step.
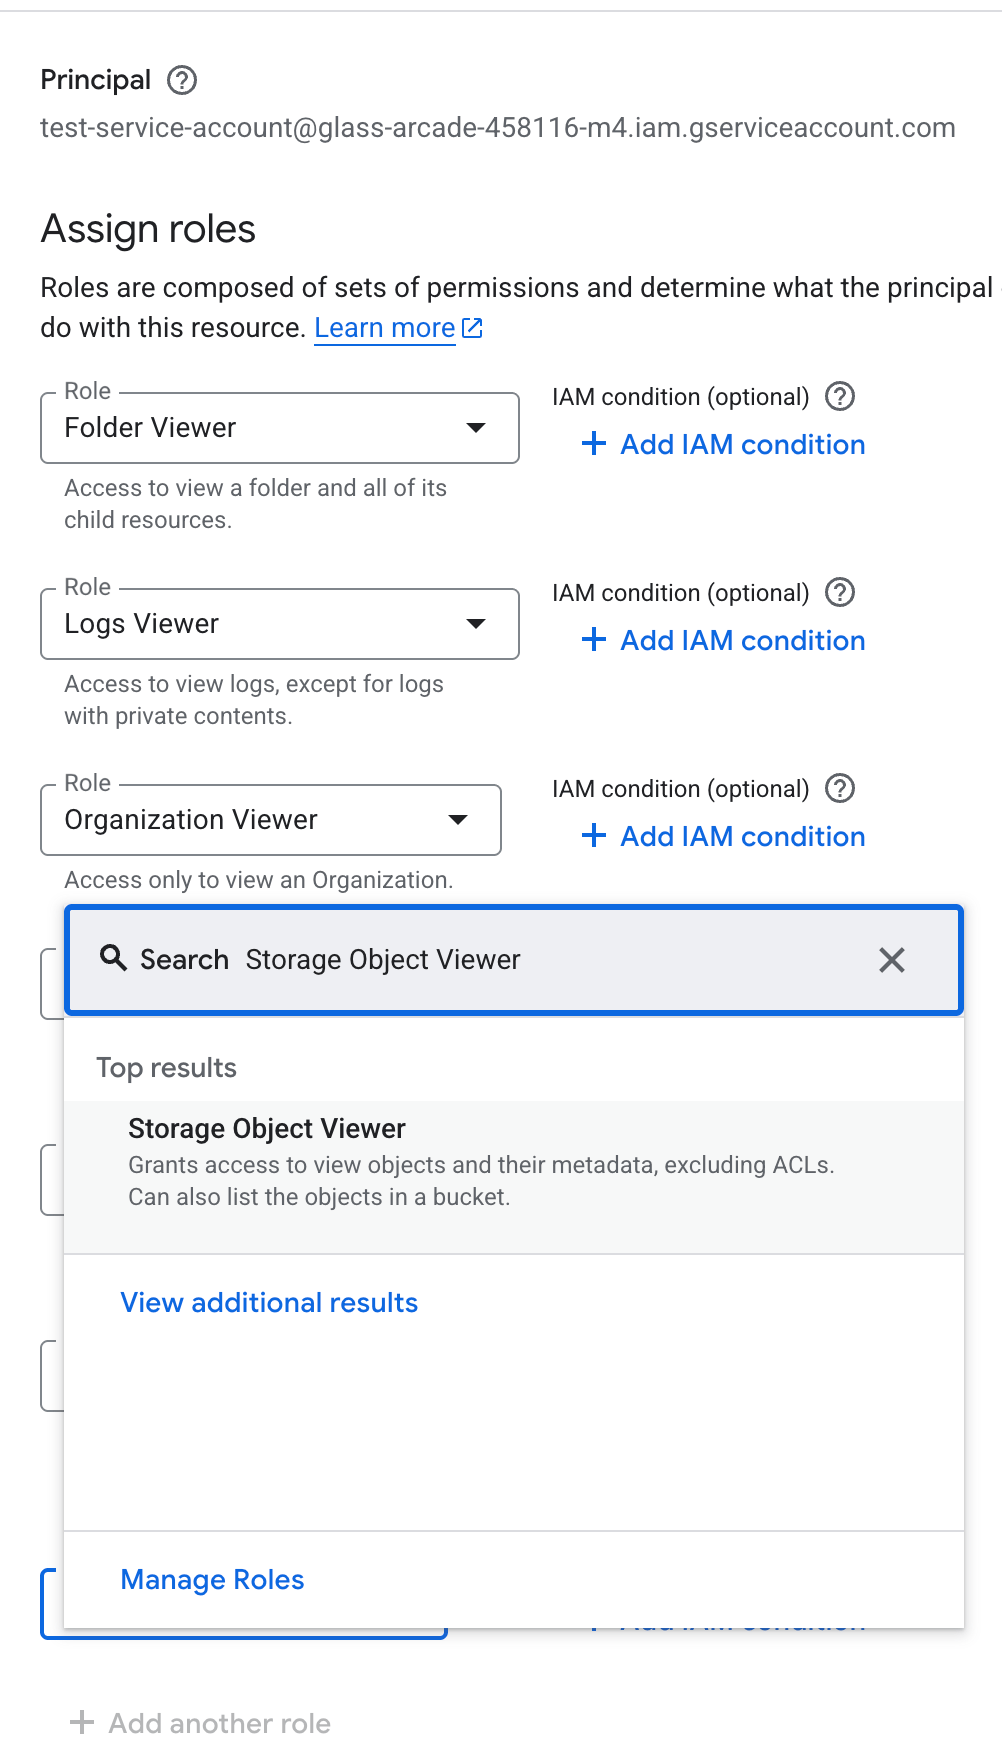
7. Navigate to **Cloud Storage** → **Buckets**, select your audit log bucket, open the **Permissions** tab, and select **Grant Access**. Add the following two principals, then select **Save**:
* **Sink writer:** In the **New principals** field, paste the Writer Identity email you copied. In the **Role** dropdown, search for and select **Storage Object Creator**.
* **Oleria connector:** In the **New principals** field, enter `oleria-connector@YOUR_PROJECT_ID.iam.gserviceaccount.com`. In the **Role** dropdown, search for and select **Storage Object Viewer**.
GCP may show a caution that a large number of log entries could be routed. This is expected - the inclusion filter above limits export to audit logs only.
**Choose logs to filter out of sink (optional):** No exclusion filters are needed. Select **Create Sink**.
6. After the sink is created, open it from the **Log Router Sinks** list and copy the **Writer Identity** service account email (e.g. `serviceAccount:p123456789-xxxxxx@gcp-sa-logging.iam.gserviceaccount.com`). You will use this address in the next step.
7. Navigate to **Cloud Storage** → **Buckets**, select your audit log bucket, open the **Permissions** tab, and select **Grant Access**. Add the following two principals, then select **Save**:
* **Sink writer:** In the **New principals** field, paste the Writer Identity email you copied. In the **Role** dropdown, search for and select **Storage Object Creator**.
* **Oleria connector:** In the **New principals** field, enter `oleria-connector@YOUR_PROJECT_ID.iam.gserviceaccount.com`. In the **Role** dropdown, search for and select **Storage Object Viewer**.
 **Option B: Using the gcloud CLI**
1. Create a GCS bucket to receive audit logs:
```bash theme={null}
gsutil mb -p YOUR_PROJECT_ID gs://YOUR_AUDIT_BUCKET
```
2. Create a Log Sink that exports organization-wide audit logs to the bucket:
```bash theme={null}
gcloud logging sinks create audit-log-sink \
storage.googleapis.com/YOUR_AUDIT_BUCKET \
--log-filter='logName=~"cloudaudit.googleapis.com"' \
--include-children \
--organization=YOUR_ORG_ID
```
3. Grant the sink's writer service account write access to the bucket:
```bash theme={null}
SINK_SA=$(gcloud logging sinks describe audit-log-sink \
--organization=YOUR_ORG_ID --format='value(writerIdentity)')
gsutil iam ch ${SINK_SA}:objectCreator gs://YOUR_AUDIT_BUCKET
```
4. Grant the connector service account read access to the bucket:
```bash theme={null}
gsutil iam ch serviceAccount:oleria-connector@YOUR_PROJECT_ID.iam.gserviceaccount.com:objectViewer \
gs://YOUR_AUDIT_BUCKET
```
Oleria automatically discovers the audit log bucket by inspecting Log Sinks - no additional configuration is needed in the Oleria workspace.
**Optional: enable Data Access audit logs for Secret Manager events**
To capture secret metadata and access events, enable **Admin Read** and/or **Data Read** audit logs for the Secret Manager API. In the Cloud Console, go to **IAM & Admin** → **Audit Logs**, find **Secret Manager API**, and check the categories you want. The audit log sink configured above picks up these events automatically once they are enabled.
| Category | Examples | Requires enablement |
| :------------- | :---------------------------------------------------------------------------------------------------------------- | :-------------------------- |
| Admin Activity | `CreateSecret`, `UpdateSecret`, `DeleteSecret`, `AddSecretVersion`, `EnableSecretVersion`, `DisableSecretVersion` | No - always on |
| Admin Read | `GetSecret`, `GetSecretVersion`, `ListSecrets`, `ListSecretVersions`, `GetIamPolicy` (on a secret) | **Yes - enable Admin Read** |
| Data Read | `AccessSecretVersion` | **Yes - enable Data Read** |
Without Data Access logging, Oleria surfaces Admin Activity events only. Data Read events (who accessed a secret value, and when) are the primary signal for identifying unused or over-permissioned secrets.
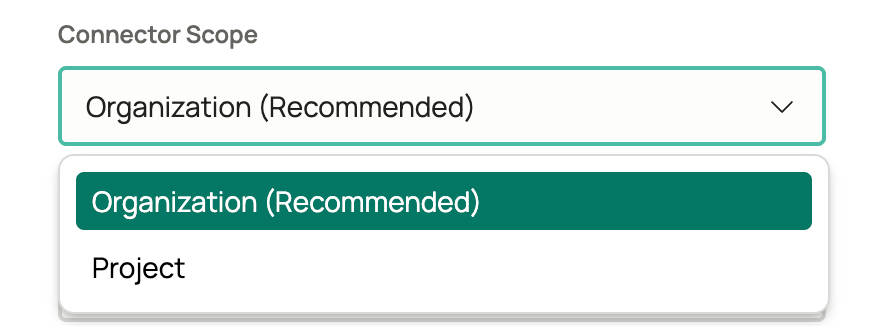
1. Log in to your Oleria workspace, select **Integrations** → select **Google Cloud Platform**. A side panel opens. Select **Organization (Recommended)** from the **Connector Scope** dropdown.
**Option B: Using the gcloud CLI**
1. Create a GCS bucket to receive audit logs:
```bash theme={null}
gsutil mb -p YOUR_PROJECT_ID gs://YOUR_AUDIT_BUCKET
```
2. Create a Log Sink that exports organization-wide audit logs to the bucket:
```bash theme={null}
gcloud logging sinks create audit-log-sink \
storage.googleapis.com/YOUR_AUDIT_BUCKET \
--log-filter='logName=~"cloudaudit.googleapis.com"' \
--include-children \
--organization=YOUR_ORG_ID
```
3. Grant the sink's writer service account write access to the bucket:
```bash theme={null}
SINK_SA=$(gcloud logging sinks describe audit-log-sink \
--organization=YOUR_ORG_ID --format='value(writerIdentity)')
gsutil iam ch ${SINK_SA}:objectCreator gs://YOUR_AUDIT_BUCKET
```
4. Grant the connector service account read access to the bucket:
```bash theme={null}
gsutil iam ch serviceAccount:oleria-connector@YOUR_PROJECT_ID.iam.gserviceaccount.com:objectViewer \
gs://YOUR_AUDIT_BUCKET
```
Oleria automatically discovers the audit log bucket by inspecting Log Sinks - no additional configuration is needed in the Oleria workspace.
**Optional: enable Data Access audit logs for Secret Manager events**
To capture secret metadata and access events, enable **Admin Read** and/or **Data Read** audit logs for the Secret Manager API. In the Cloud Console, go to **IAM & Admin** → **Audit Logs**, find **Secret Manager API**, and check the categories you want. The audit log sink configured above picks up these events automatically once they are enabled.
| Category | Examples | Requires enablement |
| :------------- | :---------------------------------------------------------------------------------------------------------------- | :-------------------------- |
| Admin Activity | `CreateSecret`, `UpdateSecret`, `DeleteSecret`, `AddSecretVersion`, `EnableSecretVersion`, `DisableSecretVersion` | No - always on |
| Admin Read | `GetSecret`, `GetSecretVersion`, `ListSecrets`, `ListSecretVersions`, `GetIamPolicy` (on a secret) | **Yes - enable Admin Read** |
| Data Read | `AccessSecretVersion` | **Yes - enable Data Read** |
Without Data Access logging, Oleria surfaces Admin Activity events only. Data Read events (who accessed a secret value, and when) are the primary signal for identifying unused or over-permissioned secrets.
1. Log in to your Oleria workspace, select **Integrations** → select **Google Cloud Platform**. A side panel opens. Select **Organization (Recommended)** from the **Connector Scope** dropdown.
 2. Provide the following and select **Authenticate**:
* **Organization ID** - your numeric GCP Organization ID (e.g. `123456789012`). Found under **IAM & Admin** → **Settings** in the Cloud Console.
* **Workspace Delegate Email** - email address of the Google Workspace admin whose permissions will be used to enumerate users and groups
* **Service Account Credentials** - paste the full contents of the JSON key file downloaded above
3. Find the newly integrated GCP Organization in your Oleria workspace connected integrations.
***
## Integrate GCP Project
1. Log in to the [Google Cloud Console](https://console.cloud.google.com), select the target project, and navigate to **IAM & Admin** → **Service Accounts**.
2. Select **Create Service Account**. Provide a name such as `oleria-connector` and select **Create and Continue**.
3. Skip the optional role grant and user access steps. Select **Done**.
The connector calls a number of Google Cloud APIs. Each one must be enabled in the **host project** of the connector service account; if any are disabled, authentication or sync will fail.
**Option A: Using the Google Cloud Console**
1. In the Google Cloud Console, select the project that owns the connector service account from the resource picker.
2. Navigate to **APIs & Services** → **Enabled APIs & services** → **Enable APIs and Services**.
3. Search for and enable each of the following:
* Cloud Resource Manager API
* Identity and Access Management (IAM) API
* Cloud Asset API
* Cloud Identity API
* Admin SDK API
* Cloud Storage API
* Cloud Logging API
* Secret Manager API
**Option B: Using the gcloud CLI**
```bash theme={null}
gcloud services enable \
cloudresourcemanager.googleapis.com \
iam.googleapis.com \
cloudasset.googleapis.com \
cloudidentity.googleapis.com \
admin.googleapis.com \
storage.googleapis.com \
logging.googleapis.com \
secretmanager.googleapis.com \
--project=YOUR_PROJECT_ID
```
`YOUR_PROJECT_ID` is the project that owns the connector service account, which is also the target project for this integration.
1. In the Google Cloud Console, navigate to **IAM & Admin** → **IAM** for the target project and select **Grant Access**.
2. Enter the connector service account email and assign the following roles:
```
roles/iam.securityReviewer
roles/cloudasset.viewer
roles/storage.objectViewer
roles/logging.viewer
roles/secretmanager.viewer
```
`roles/cloudasset.viewer` lets the connector use Cloud Asset Inventory to scan IAM policy bindings and service account inventory across the project in bulk, rather than resource by resource. Sync fails without it. `roles/logging.viewer` is required for activity sync via Cloud Audit Logs. `roles/secretmanager.viewer` grants 11 permissions in total; of those, Oleria's connector relies on three - `secretmanager.secrets.list`, `secretmanager.secrets.getIamPolicy`, and `secretmanager.versions.get`. Oleria never reads secret values, so `roles/secretmanager.secretAccessor` (which grants `secretmanager.versions.access`) is intentionally NOT required.
Oleria's GCP risk signals come entirely from Security Command Center (SCC) findings.
Skipping this step doesn't break setup - the connection still completes and syncs your IAM data normally - but no GCP risks will appear in Risk Monitoring until all three of the following are done.
1. Enable the **Security Command Center API** (`securitycenter.googleapis.com`) in the host project.
2. Grant the connector service account `roles/securitycenter.findingsViewer` at the project level.
3. Confirm SCC itself is activated for this project. This is separate from enabling the API: go to [Security Command Center](https://console.cloud.google.com/security/command-center/overview) in the Cloud Console and select the project. If a findings dashboard loads, SCC is active. If you see an activation prompt instead, a **Security Center Admin** needs to activate a tier (Standard is free) for the project before Oleria can surface findings.
1. In **IAM & Admin** → **Service Accounts**, select the service account you created in the first step.
2. Navigate to the **Keys** tab and select **Add Key** → **Create new key**.
3. Select **JSON** format and select **Create**. The key file will be downloaded to your machine. Keep this file secure - you will provide it to Oleria in the final step.
Domain-wide delegation allows the connector service account to enumerate Google Workspace users and groups on behalf of a delegated admin.
1. Log in to the [Google Workspace Admin Console](https://admin.google.com) and navigate to **Security** → **Access and data control** → **API controls**. Under **Domain-wide delegation**, select **Manage Domain Wide Delegation**.
2. Select **Add new**.
3. Provide the **Client ID** of the service account (found under **IAM & Admin** → **Service Accounts** → select the SA → **Details** tab → **Unique ID**) and add the following OAuth scopes:
```
https://www.googleapis.com/auth/admin.directory.user.readonly
https://www.googleapis.com/auth/cloud-identity.groups.readonly
```
4. Select **Authorize**.
The Google Workspace admin email provided as the Workspace Delegate Email in the final step must have at least read access to user and group directories.
This step enables Oleria to ingest Cloud Audit Logs for user activity insights.
Choose a globally unique name for your audit log bucket - you'll use it as `YOUR_AUDIT_BUCKET` throughout this step.
**Option A: Using the Google Cloud Console**
1. In the Cloud Console, confirm the target **Project** is selected in the resource picker at the top of the page.
2. Navigate to **Cloud Storage** → **Buckets** and select **Create**. Provide a globally unique bucket name (this will be your `YOUR_AUDIT_BUCKET`), choose a location, and accept the defaults for the remaining settings. Select **Create**.
3. Navigate to **Logging** → **Log Router**. The fastest way is to type `log router` in the GCP search bar at the top of the page and select **Log Router** (listed as **Product page - Logging**) from the results.
4. On the **Log Router Sinks** page, confirm the resource scope shows your target **Project**, then select **Create Sink** at the top of the page.
5. The **Create logs routing sink** wizard opens with four steps. Complete them as follows:
**Sink details:** Enter `audit-log-sink` as the **Sink name**. Optionally add a description. Select **Next**.
**Sink destination:** From the **Select sink service** dropdown, choose **Cloud Storage bucket**. Select your bucket from the browser, or type the destination directly as `storage.googleapis.com/YOUR_AUDIT_BUCKET`. Select **Next**.
2. Provide the following and select **Authenticate**:
* **Organization ID** - your numeric GCP Organization ID (e.g. `123456789012`). Found under **IAM & Admin** → **Settings** in the Cloud Console.
* **Workspace Delegate Email** - email address of the Google Workspace admin whose permissions will be used to enumerate users and groups
* **Service Account Credentials** - paste the full contents of the JSON key file downloaded above
3. Find the newly integrated GCP Organization in your Oleria workspace connected integrations.
***
## Integrate GCP Project
1. Log in to the [Google Cloud Console](https://console.cloud.google.com), select the target project, and navigate to **IAM & Admin** → **Service Accounts**.
2. Select **Create Service Account**. Provide a name such as `oleria-connector` and select **Create and Continue**.
3. Skip the optional role grant and user access steps. Select **Done**.
The connector calls a number of Google Cloud APIs. Each one must be enabled in the **host project** of the connector service account; if any are disabled, authentication or sync will fail.
**Option A: Using the Google Cloud Console**
1. In the Google Cloud Console, select the project that owns the connector service account from the resource picker.
2. Navigate to **APIs & Services** → **Enabled APIs & services** → **Enable APIs and Services**.
3. Search for and enable each of the following:
* Cloud Resource Manager API
* Identity and Access Management (IAM) API
* Cloud Asset API
* Cloud Identity API
* Admin SDK API
* Cloud Storage API
* Cloud Logging API
* Secret Manager API
**Option B: Using the gcloud CLI**
```bash theme={null}
gcloud services enable \
cloudresourcemanager.googleapis.com \
iam.googleapis.com \
cloudasset.googleapis.com \
cloudidentity.googleapis.com \
admin.googleapis.com \
storage.googleapis.com \
logging.googleapis.com \
secretmanager.googleapis.com \
--project=YOUR_PROJECT_ID
```
`YOUR_PROJECT_ID` is the project that owns the connector service account, which is also the target project for this integration.
1. In the Google Cloud Console, navigate to **IAM & Admin** → **IAM** for the target project and select **Grant Access**.
2. Enter the connector service account email and assign the following roles:
```
roles/iam.securityReviewer
roles/cloudasset.viewer
roles/storage.objectViewer
roles/logging.viewer
roles/secretmanager.viewer
```
`roles/cloudasset.viewer` lets the connector use Cloud Asset Inventory to scan IAM policy bindings and service account inventory across the project in bulk, rather than resource by resource. Sync fails without it. `roles/logging.viewer` is required for activity sync via Cloud Audit Logs. `roles/secretmanager.viewer` grants 11 permissions in total; of those, Oleria's connector relies on three - `secretmanager.secrets.list`, `secretmanager.secrets.getIamPolicy`, and `secretmanager.versions.get`. Oleria never reads secret values, so `roles/secretmanager.secretAccessor` (which grants `secretmanager.versions.access`) is intentionally NOT required.
Oleria's GCP risk signals come entirely from Security Command Center (SCC) findings.
Skipping this step doesn't break setup - the connection still completes and syncs your IAM data normally - but no GCP risks will appear in Risk Monitoring until all three of the following are done.
1. Enable the **Security Command Center API** (`securitycenter.googleapis.com`) in the host project.
2. Grant the connector service account `roles/securitycenter.findingsViewer` at the project level.
3. Confirm SCC itself is activated for this project. This is separate from enabling the API: go to [Security Command Center](https://console.cloud.google.com/security/command-center/overview) in the Cloud Console and select the project. If a findings dashboard loads, SCC is active. If you see an activation prompt instead, a **Security Center Admin** needs to activate a tier (Standard is free) for the project before Oleria can surface findings.
1. In **IAM & Admin** → **Service Accounts**, select the service account you created in the first step.
2. Navigate to the **Keys** tab and select **Add Key** → **Create new key**.
3. Select **JSON** format and select **Create**. The key file will be downloaded to your machine. Keep this file secure - you will provide it to Oleria in the final step.
Domain-wide delegation allows the connector service account to enumerate Google Workspace users and groups on behalf of a delegated admin.
1. Log in to the [Google Workspace Admin Console](https://admin.google.com) and navigate to **Security** → **Access and data control** → **API controls**. Under **Domain-wide delegation**, select **Manage Domain Wide Delegation**.
2. Select **Add new**.
3. Provide the **Client ID** of the service account (found under **IAM & Admin** → **Service Accounts** → select the SA → **Details** tab → **Unique ID**) and add the following OAuth scopes:
```
https://www.googleapis.com/auth/admin.directory.user.readonly
https://www.googleapis.com/auth/cloud-identity.groups.readonly
```
4. Select **Authorize**.
The Google Workspace admin email provided as the Workspace Delegate Email in the final step must have at least read access to user and group directories.
This step enables Oleria to ingest Cloud Audit Logs for user activity insights.
Choose a globally unique name for your audit log bucket - you'll use it as `YOUR_AUDIT_BUCKET` throughout this step.
**Option A: Using the Google Cloud Console**
1. In the Cloud Console, confirm the target **Project** is selected in the resource picker at the top of the page.
2. Navigate to **Cloud Storage** → **Buckets** and select **Create**. Provide a globally unique bucket name (this will be your `YOUR_AUDIT_BUCKET`), choose a location, and accept the defaults for the remaining settings. Select **Create**.
3. Navigate to **Logging** → **Log Router**. The fastest way is to type `log router` in the GCP search bar at the top of the page and select **Log Router** (listed as **Product page - Logging**) from the results.
4. On the **Log Router Sinks** page, confirm the resource scope shows your target **Project**, then select **Create Sink** at the top of the page.
5. The **Create logs routing sink** wizard opens with four steps. Complete them as follows:
**Sink details:** Enter `audit-log-sink` as the **Sink name**. Optionally add a description. Select **Next**.
**Sink destination:** From the **Select sink service** dropdown, choose **Cloud Storage bucket**. Select your bucket from the browser, or type the destination directly as `storage.googleapis.com/YOUR_AUDIT_BUCKET`. Select **Next**.
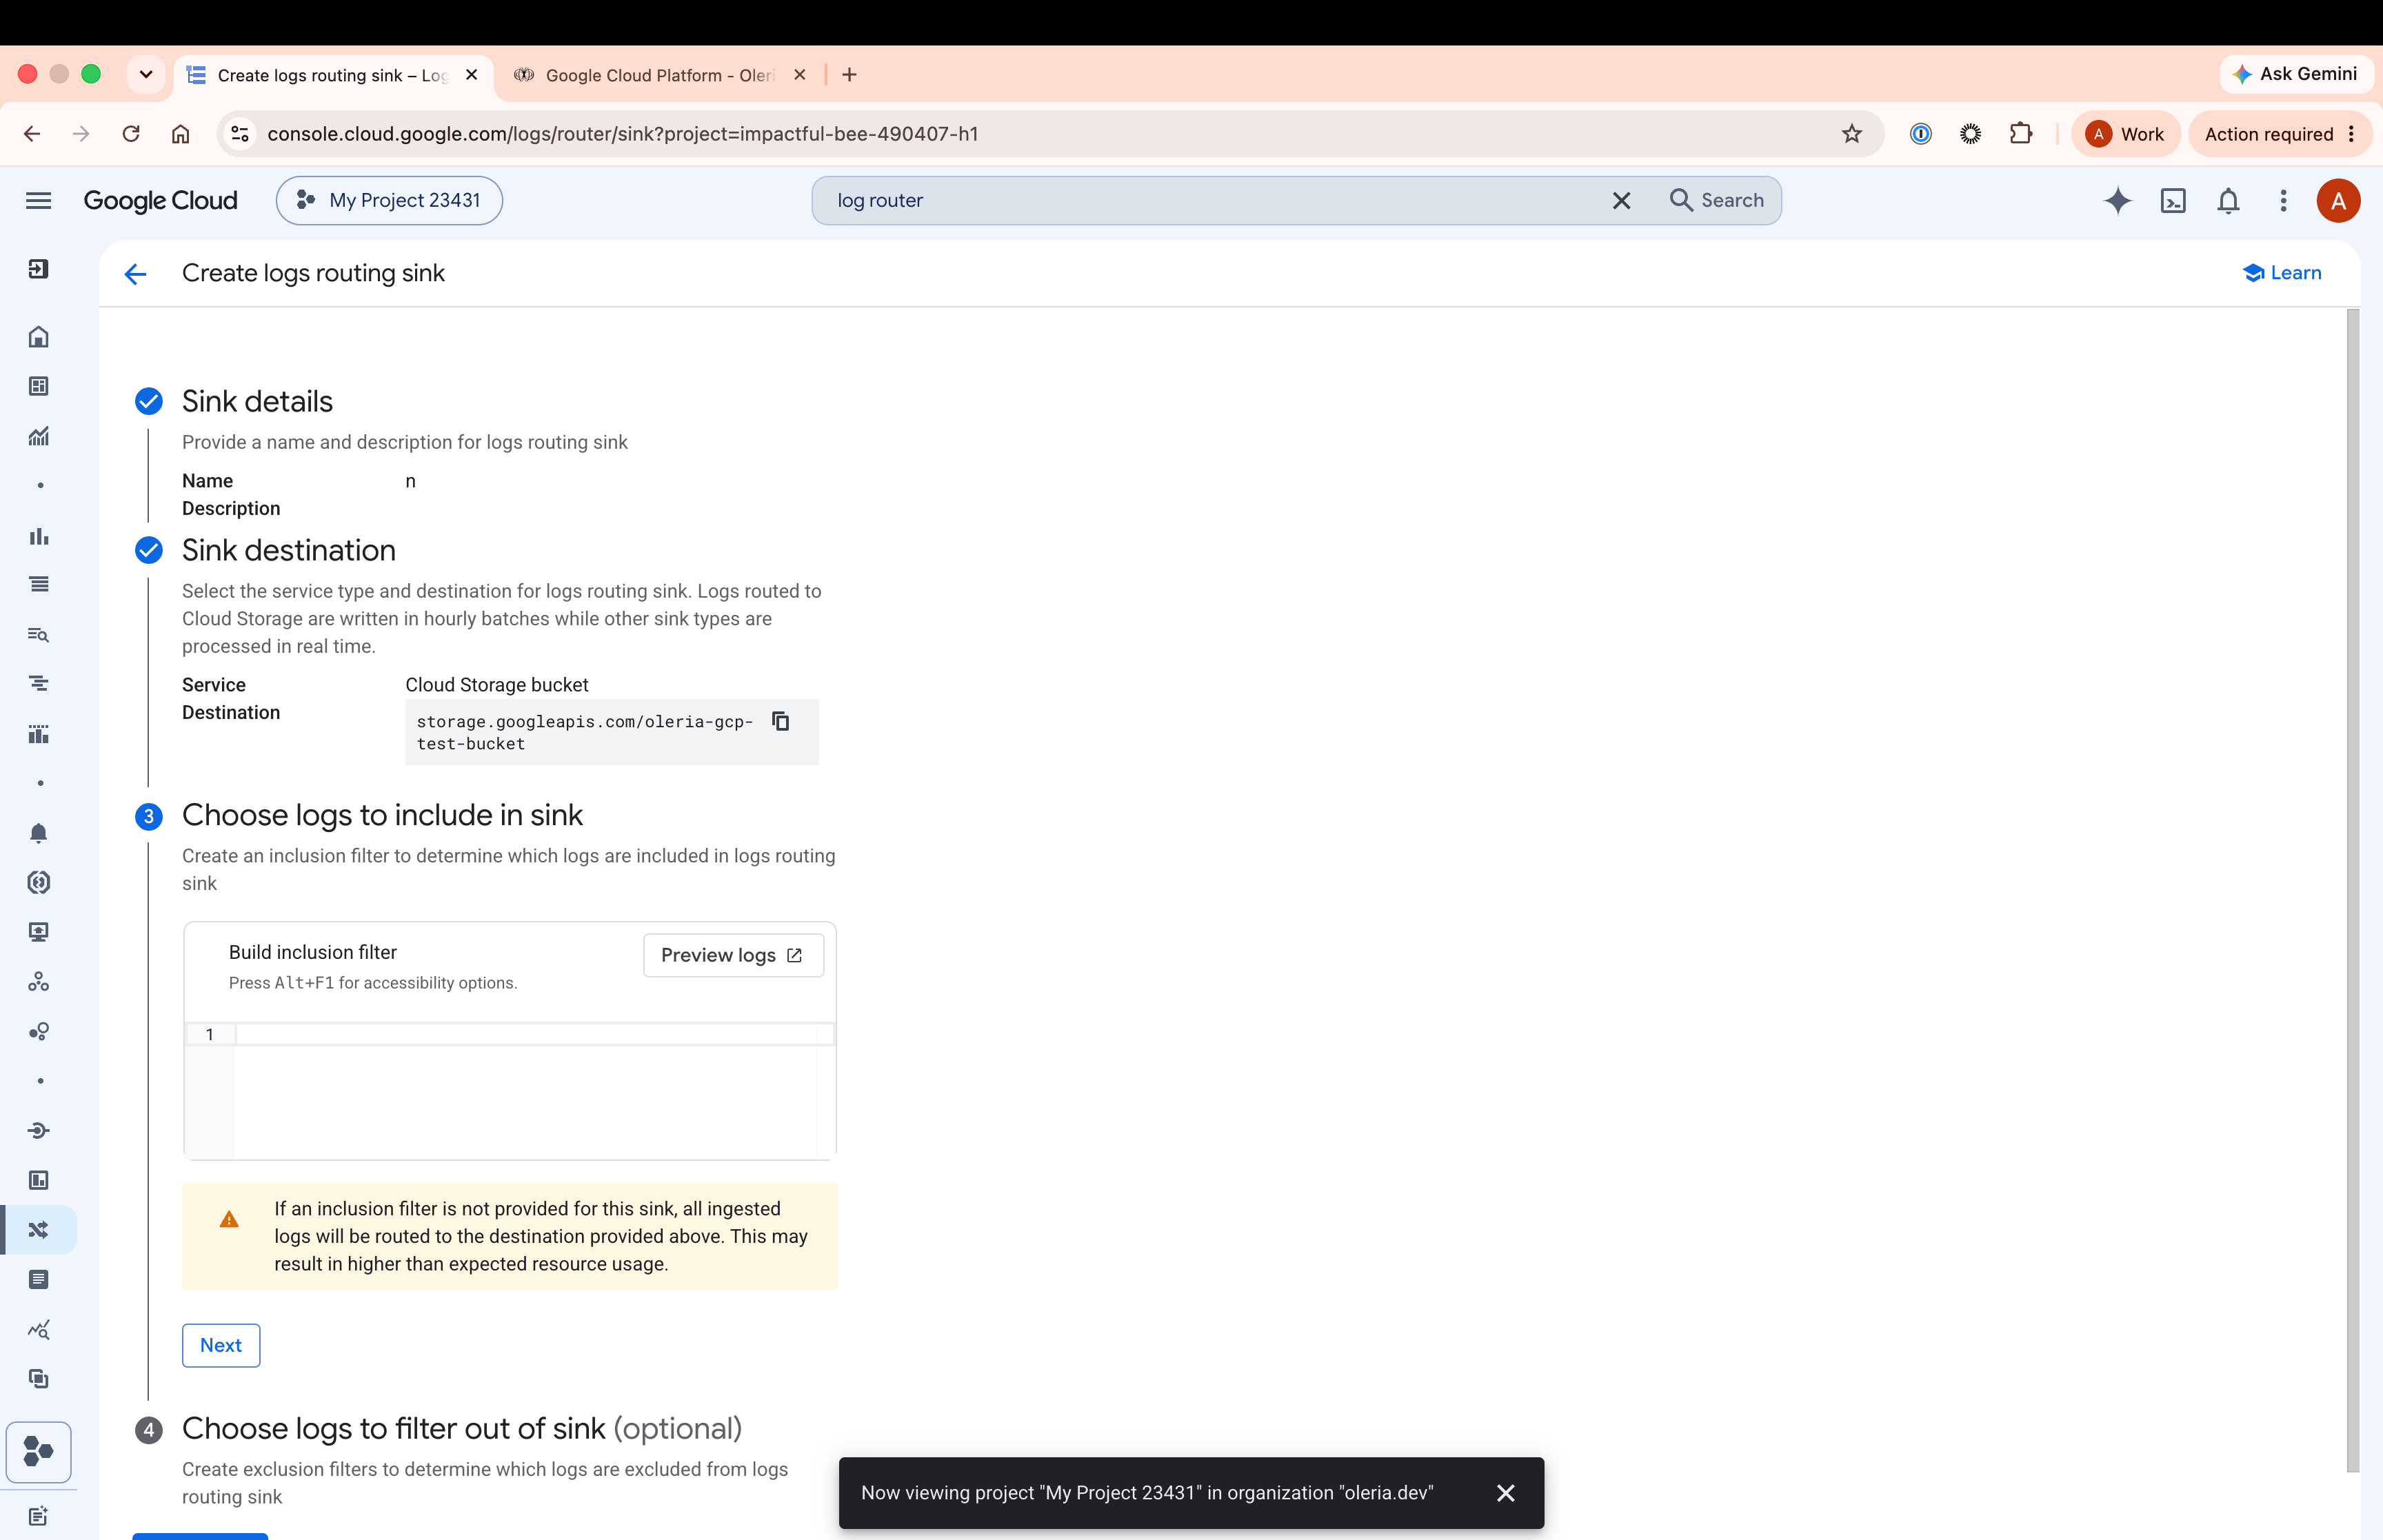 **Choose logs to include in sink:** In the **Build inclusion filter** field, enter the following and select **Next**:
```
logName=~"cloudaudit.googleapis.com"
```
**Choose logs to filter out of sink (optional):** No exclusion filters are needed. Select **Create Sink**.
6. After the sink is created, open it from the **Log Router Sinks** list and copy the **Writer Identity** service account email (e.g. `serviceAccount:p123456789-xxxxxx@gcp-sa-logging.iam.gserviceaccount.com`). You will use this address in the next step.
7. Navigate to **Cloud Storage** → **Buckets**, select your audit log bucket, open the **Permissions** tab, and select **Grant Access**. Add the following two principals, then select **Save**:
* **Sink writer:** In the **New principals** field, paste the Writer Identity email you copied. In the **Role** dropdown, search for and select **Storage Object Creator**.
* **Oleria connector:** In the **New principals** field, enter `oleria-connector@YOUR_PROJECT_ID.iam.gserviceaccount.com`. In the **Role** dropdown, search for and select **Storage Object Viewer**.
**Option B: Using the gcloud CLI**
1. Create a GCS bucket to receive audit logs:
```bash theme={null}
gsutil mb -p YOUR_PROJECT_ID gs://YOUR_AUDIT_BUCKET
```
2. Create a Log Sink that exports project-level audit logs to the bucket:
```bash theme={null}
gcloud logging sinks create audit-log-sink \
storage.googleapis.com/YOUR_AUDIT_BUCKET \
--log-filter='logName=~"cloudaudit.googleapis.com"' \
--project=YOUR_PROJECT_ID
```
3. Grant the sink's writer service account write access to the bucket:
```bash theme={null}
SINK_SA=$(gcloud logging sinks describe audit-log-sink \
--project=YOUR_PROJECT_ID --format='value(writerIdentity)')
gsutil iam ch ${SINK_SA}:objectCreator gs://YOUR_AUDIT_BUCKET
```
4. Grant the connector service account read access to the bucket:
```bash theme={null}
gsutil iam ch serviceAccount:oleria-connector@YOUR_PROJECT_ID.iam.gserviceaccount.com:objectViewer \
gs://YOUR_AUDIT_BUCKET
```
Oleria automatically discovers the audit log bucket by inspecting Log Sinks - no additional configuration is needed in the Oleria workspace.
**Optional: enable Data Access audit logs for Secret Manager events**
To capture secret metadata and access events, enable **Admin Read** and/or **Data Read** audit logs for the Secret Manager API. In the Cloud Console, go to **IAM & Admin** → **Audit Logs**, find **Secret Manager API**, and check the categories you want. The audit log sink configured above picks up these events automatically once they are enabled.
| Category | Examples | Requires enablement |
| :------------- | :---------------------------------------------------------------------------------------------------------------- | :-------------------------- |
| Admin Activity | `CreateSecret`, `UpdateSecret`, `DeleteSecret`, `AddSecretVersion`, `EnableSecretVersion`, `DisableSecretVersion` | No - always on |
| Admin Read | `GetSecret`, `GetSecretVersion`, `ListSecrets`, `ListSecretVersions`, `GetIamPolicy` (on a secret) | **Yes - enable Admin Read** |
| Data Read | `AccessSecretVersion` | **Yes - enable Data Read** |
Without Data Access logging, Oleria surfaces Admin Activity events only. Data Read events (who accessed a secret value, and when) are the primary signal for identifying unused or over-permissioned secrets.
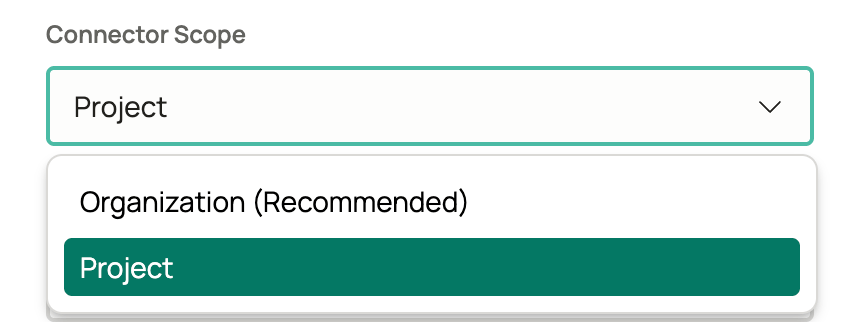
1. Log in to your Oleria workspace, select **Integrations** → select **Google Cloud Platform**. A side panel opens. Select **Project** from the **Connector Scope** dropdown.
**Choose logs to include in sink:** In the **Build inclusion filter** field, enter the following and select **Next**:
```
logName=~"cloudaudit.googleapis.com"
```
**Choose logs to filter out of sink (optional):** No exclusion filters are needed. Select **Create Sink**.
6. After the sink is created, open it from the **Log Router Sinks** list and copy the **Writer Identity** service account email (e.g. `serviceAccount:p123456789-xxxxxx@gcp-sa-logging.iam.gserviceaccount.com`). You will use this address in the next step.
7. Navigate to **Cloud Storage** → **Buckets**, select your audit log bucket, open the **Permissions** tab, and select **Grant Access**. Add the following two principals, then select **Save**:
* **Sink writer:** In the **New principals** field, paste the Writer Identity email you copied. In the **Role** dropdown, search for and select **Storage Object Creator**.
* **Oleria connector:** In the **New principals** field, enter `oleria-connector@YOUR_PROJECT_ID.iam.gserviceaccount.com`. In the **Role** dropdown, search for and select **Storage Object Viewer**.
**Option B: Using the gcloud CLI**
1. Create a GCS bucket to receive audit logs:
```bash theme={null}
gsutil mb -p YOUR_PROJECT_ID gs://YOUR_AUDIT_BUCKET
```
2. Create a Log Sink that exports project-level audit logs to the bucket:
```bash theme={null}
gcloud logging sinks create audit-log-sink \
storage.googleapis.com/YOUR_AUDIT_BUCKET \
--log-filter='logName=~"cloudaudit.googleapis.com"' \
--project=YOUR_PROJECT_ID
```
3. Grant the sink's writer service account write access to the bucket:
```bash theme={null}
SINK_SA=$(gcloud logging sinks describe audit-log-sink \
--project=YOUR_PROJECT_ID --format='value(writerIdentity)')
gsutil iam ch ${SINK_SA}:objectCreator gs://YOUR_AUDIT_BUCKET
```
4. Grant the connector service account read access to the bucket:
```bash theme={null}
gsutil iam ch serviceAccount:oleria-connector@YOUR_PROJECT_ID.iam.gserviceaccount.com:objectViewer \
gs://YOUR_AUDIT_BUCKET
```
Oleria automatically discovers the audit log bucket by inspecting Log Sinks - no additional configuration is needed in the Oleria workspace.
**Optional: enable Data Access audit logs for Secret Manager events**
To capture secret metadata and access events, enable **Admin Read** and/or **Data Read** audit logs for the Secret Manager API. In the Cloud Console, go to **IAM & Admin** → **Audit Logs**, find **Secret Manager API**, and check the categories you want. The audit log sink configured above picks up these events automatically once they are enabled.
| Category | Examples | Requires enablement |
| :------------- | :---------------------------------------------------------------------------------------------------------------- | :-------------------------- |
| Admin Activity | `CreateSecret`, `UpdateSecret`, `DeleteSecret`, `AddSecretVersion`, `EnableSecretVersion`, `DisableSecretVersion` | No - always on |
| Admin Read | `GetSecret`, `GetSecretVersion`, `ListSecrets`, `ListSecretVersions`, `GetIamPolicy` (on a secret) | **Yes - enable Admin Read** |
| Data Read | `AccessSecretVersion` | **Yes - enable Data Read** |
Without Data Access logging, Oleria surfaces Admin Activity events only. Data Read events (who accessed a secret value, and when) are the primary signal for identifying unused or over-permissioned secrets.
1. Log in to your Oleria workspace, select **Integrations** → select **Google Cloud Platform**. A side panel opens. Select **Project** from the **Connector Scope** dropdown.
 2. Provide the following and select **Authenticate**:
* **Project ID** - your GCP Project ID (e.g. `my-project`). Found in the Cloud Console project selector at the top of the page.
* **Workspace Delegate Email** - email address of the Google Workspace admin whose permissions will be used to enumerate users and groups
* **Service Account Credentials** - paste the full contents of the JSON key file downloaded above
3. Find the newly integrated GCP Project in your Oleria workspace connected integrations.
***
## Enable Remediations (Optional)
Remediations allow Oleria to take automated or one-click corrective actions - such as revoking an IAM binding, removing a group member, or disabling a service account - directly from the Oleria workspace.
To allow Oleria to take remediation actions in your GCP environment, grant the connector service account the following additional roles:
* To **revoke an IAM binding at the project level**, grant `roles/resourcemanager.projectIamAdmin` on the project.
* To **revoke an IAM binding at the organization level**, grant `roles/resourcemanager.organizationIamAdmin` on the organization.
* To **remove a member from a Cloud Identity group**, grant `roles/cloudidentity.groups.editor`.
* To **disable a service account**, grant `roles/iam.serviceAccountAdmin` on the project that owns the service account.
Secret Manager secrets are discovery-only in this integration. The **revoke IAM binding** remediations above apply to project, folder, organization, GCS bucket, and service account bindings, but not to Secret Manager secret bindings.
## Contact us
For questions about this integration, contact us at [support@oleria.com](mailto:support@oleria.com).
2. Provide the following and select **Authenticate**:
* **Project ID** - your GCP Project ID (e.g. `my-project`). Found in the Cloud Console project selector at the top of the page.
* **Workspace Delegate Email** - email address of the Google Workspace admin whose permissions will be used to enumerate users and groups
* **Service Account Credentials** - paste the full contents of the JSON key file downloaded above
3. Find the newly integrated GCP Project in your Oleria workspace connected integrations.
***
## Enable Remediations (Optional)
Remediations allow Oleria to take automated or one-click corrective actions - such as revoking an IAM binding, removing a group member, or disabling a service account - directly from the Oleria workspace.
To allow Oleria to take remediation actions in your GCP environment, grant the connector service account the following additional roles:
* To **revoke an IAM binding at the project level**, grant `roles/resourcemanager.projectIamAdmin` on the project.
* To **revoke an IAM binding at the organization level**, grant `roles/resourcemanager.organizationIamAdmin` on the organization.
* To **remove a member from a Cloud Identity group**, grant `roles/cloudidentity.groups.editor`.
* To **disable a service account**, grant `roles/iam.serviceAccountAdmin` on the project that owns the service account.
Secret Manager secrets are discovery-only in this integration. The **revoke IAM binding** remediations above apply to project, folder, organization, GCS bucket, and service account bindings, but not to Secret Manager secret bindings.
## Contact us
For questions about this integration, contact us at [support@oleria.com](mailto:support@oleria.com).