
Only Oleria Administrators can enable applications or set gateway policy. View role permissions.
Open the gateway console
In the admin portal, atyouroleriainstancename.oleria.io, go to Governance -> Oleria AI Agent Gateway.
The console is organized into tabs:
Enable an application
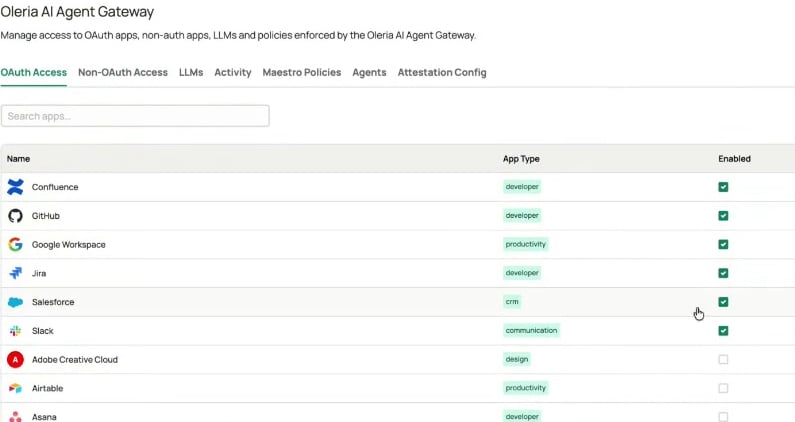
Applications are disabled by default. Nothing reaches an application through the gateway until you enable it.1
Find the application
On the OAuth Access tab, search for the application by name. The catalog lists every application the gateway supports, with its category under App Type.
2
Enable it
Select the checkbox in the Enabled column. The change takes effect immediately - users can now connect the application to their own account, and agents can reach it once a user has connected it.Clearing the checkbox blocks the application again, for everyone, without anyone having to disconnect it.
3
Open its policy
Select the application’s row to open its policy panel, then set the controls described below.
Set the application’s policy
Each application has its own policy panel, covering what happens when an agent attempts a high-impact action and any custom rules you add on top.Risky operations
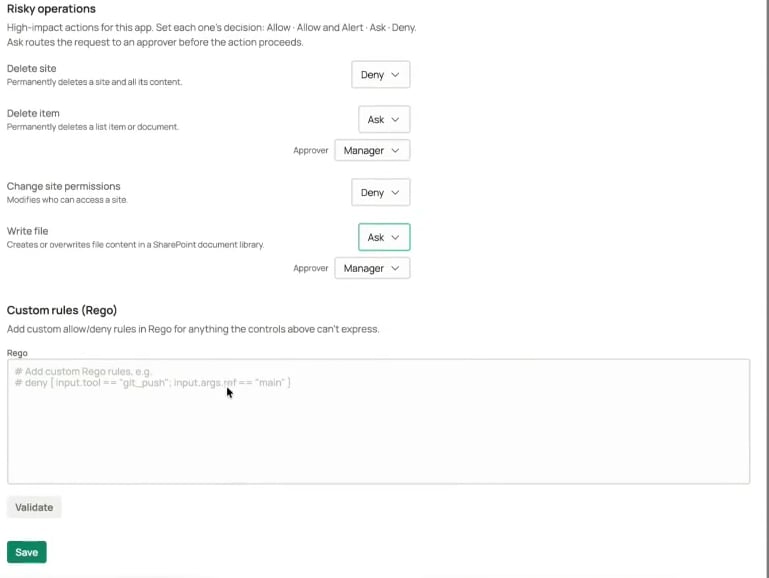
Risky operations are the high-impact actions the gateway recognizes for an application - deleting a site, deleting an item, changing permissions, writing a file. Each one gets a decision, which the gateway evaluates before the action reaches the application.
Choosing Ask reveals an Approver field. Set it to the requester’s manager, or to a specific person who should decide.
A denial is returned to the agent as a refusal, not a silent failure. The agent is told the action isn’t permitted, so it can report the outcome to the person who asked for it rather than retrying blindly.
Custom rules (Rego)
Risky operations cover the actions Oleria has modeled for each application. For anything else, write custom allow and deny rules in Rego. Use custom rules when the decision depends on the details of the call rather than the action alone - for example, denying a push to a protected branch while allowing pushes everywhere else:Make the gateway available in your AI tools
Enabling an application decides what agents may reach. Your AI tool still needs to know where the gateway is. Most AI tools let an administrator publish a connector once for the whole organization, so members find it already listed instead of pasting a URL themselves. In Claude, this is done by a Claude organization administrator, separately from Oleria.1
Open your AI tool's admin settings
In Claude, go to Admin settings -> Connectors, under Libraries & Access.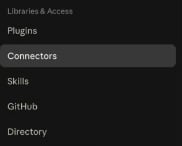
2
Add the gateway as a custom connector
Select Add, then Custom -> Web.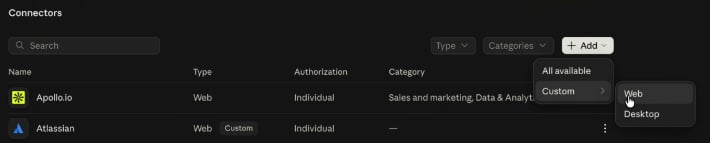
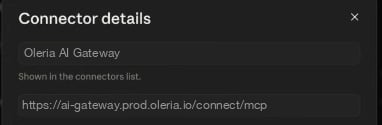
3
Leave authorization to each member
Under Authentication, turn on Browser sign-in. Each member signs in to Oleria themselves the first time they use the connector, so the gateway acts as that person - with their permissions and their connected applications. Publishing the connector does not grant anyone access on its own.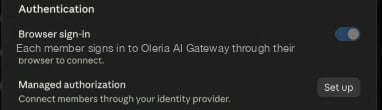
Members can also add the connector themselves if you’d rather not publish it centrally. Either way, each person authorizes it individually. See Connect and use your AI agent.
Review what agents are doing
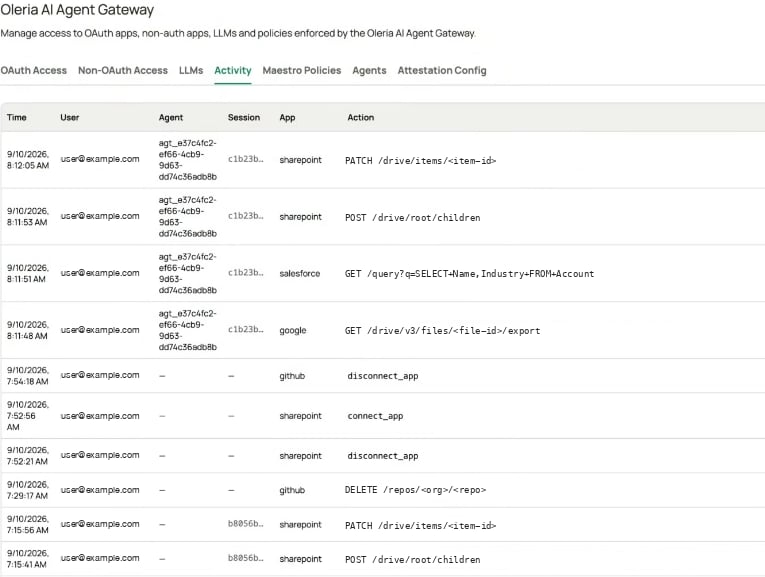
The Activity tab is the audit trail for the whole organization. It records every call that passed through the gateway - the time, the user it ran as, the agent, the session, the application, and the exact action attempted.